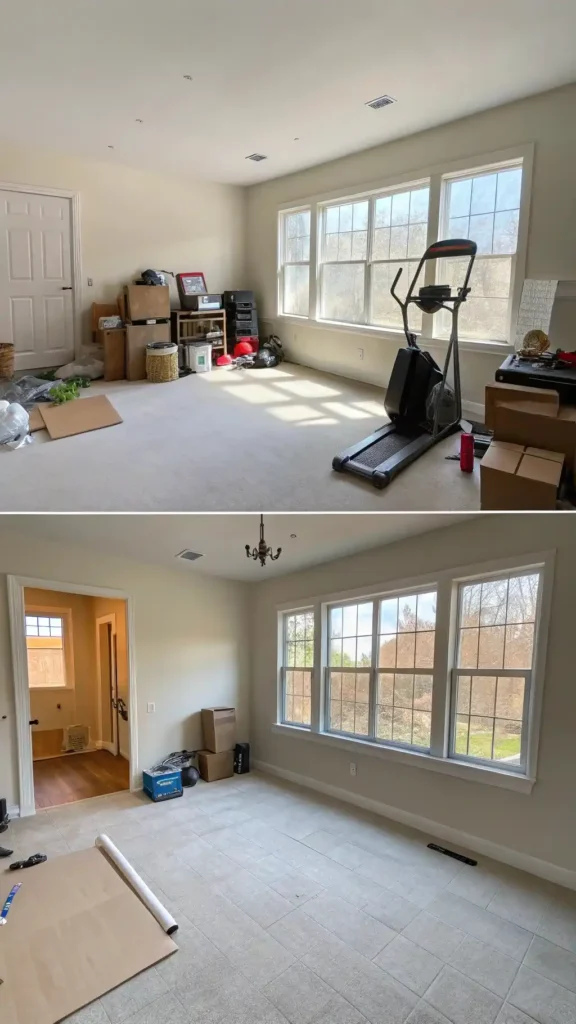
That spare room in your home—you know, the one filled with old boxes, unused furniture, and maybe a treadmill that’s become a glorified clothes rack—has so much potential. Imagine transforming it into a dream home office: a space that’s not only functional but also inspires creativity, focus, and productivity. Sounds amazing, right? But where do you even start?
Disclaimer: This blog post may contain affiliate links. I may earn a small commission for any purchases made through these links.
I faced this exact challenge last year when I decided to finally reclaim our guest room that had slowly morphed into a storage unit for holiday decorations and forgotten hobbies. After weeks of planning, a weekend of hard work, and some strategic shopping, I created a home office that I genuinely look forward to working in every day.
In this guide, I’ll walk you through each step of the process, from clearing out the clutter to adding those final personal touches that make the space uniquely yours. Whether you’re preparing for long-term remote work or simply need a dedicated space for personal projects, these steps will help you create a home office that’s both functional and inspiring.
Step 1: Declutter and Clear the Space
Before you can create your dream office, you need a clean slate. When I started my office transformation, I was shocked by how much stuff had accumulated in our spare room over the years.
Start by setting aside a full day (trust me, you’ll need it) to sort through everything. Create three distinct piles:
- Keep: Items you genuinely use and need
- Donate: Things in good condition that someone else might appreciate
- Discard: Broken items or things past their usefulness
Be ruthless! I had to ask myself tough questions like, “Have I used this in the past year?” and “Would I buy this again today?”
For items you want to keep but don’t need in your office, consider under-bed storage containers, vacuum-sealed bags for seasonal items, or investing in a small storage unit if you’re seriously short on space. I repurposed an unused corner of our basement with some sturdy shelves, which freed up the room entirely.
Step 2: Assess Your Needs and Plan the Layout
Now that you have an empty canvas, it’s time to envision how you’ll use the space. This step is crucial—I initially rushed through it and ended up rearranging furniture three times before getting it right!

Ask yourself:
- What type of work will you be doing? (Writing, video calls, creative projects?)
- How many hours per day will you spend here?
- Do you need space for physical files or mostly digital storage?
- Will clients or colleagues ever visit this space?
Grab a measuring tape and note the room’s dimensions, including windows, doors, electrical outlets, and any fixed features. I found it helpful to sketch the room on graph paper (where each square equals one foot) to experiment with different layouts.
Online room planners can be game-changers here—I used the free IKEA room planner to visualize different configurations before moving a single piece of furniture. This saved me from making some expensive mistakes!
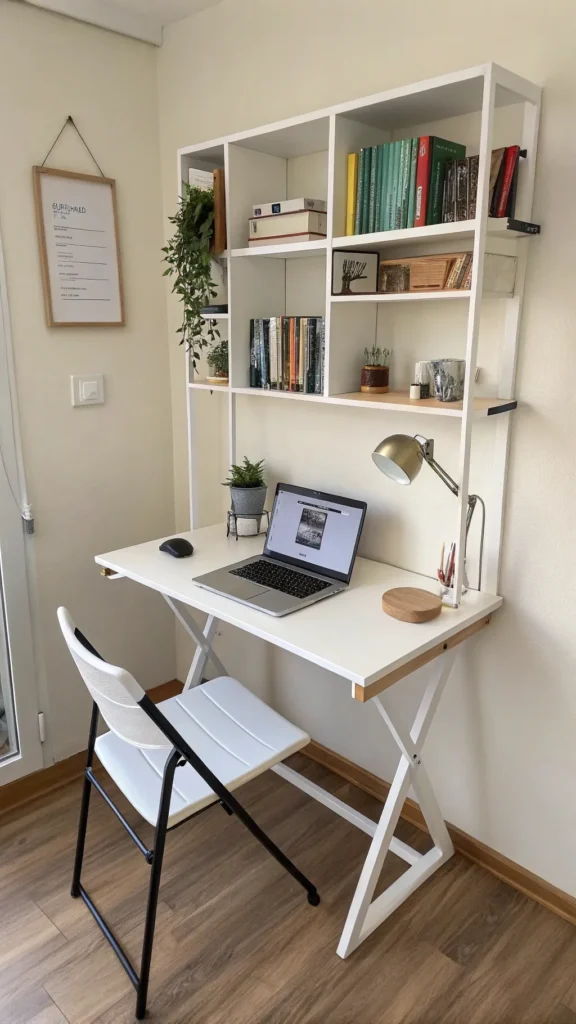
Step 3: Choose a Functional Desk and Chair for Dream Home Office
Your desk and chair are the workhorses of your home office—this is not the place to prioritize style over substance.

After developing back pain from working at our dining table for months, I learned the hard way that ergonomics matter. Look for a desk at the right height (typically 29-30 inches from the floor) with enough surface area for your work style. Consider:
- Standing desks if you like to alternate between sitting and standing
- L-shaped desks if you need separate zones for different tasks
- Compact writing desks if you’re working with limited space
For your chair, invest in quality if possible—you’ll be spending hours in it! Look for:
- Adjustable height and armrests
- Good lumbar support
- Breathable material
- A seat depth that allows you to sit with your back against the backrest while keeping 2-3 inches between the edge of the seat and the back of your knees
I splurged on my chair and economized elsewhere—it was the best decision I made in the entire process.
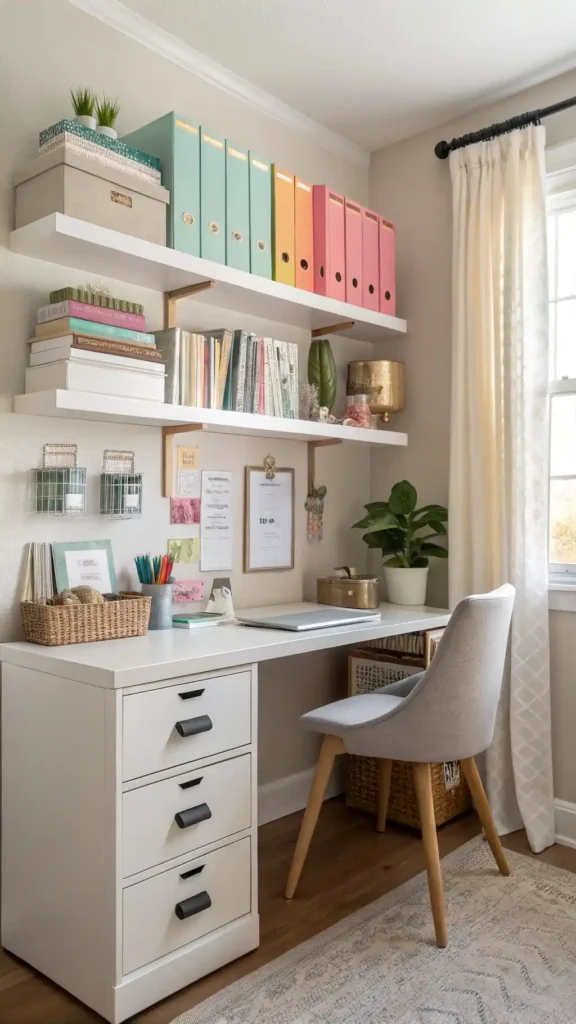
Step 4: Maximize Storage and Organization
Nothing kills productivity faster than clutter and disorganization. When designing my office, I underestimated how much storage I’d need—learn from my mistake!
Start by categorizing what you need to store:
- Everyday items that should be within arm’s reach
- Reference materials you use occasionally
- Archival items you rarely access but need to keep
Then, choose storage solutions that fit your space and aesthetic:
- Floating shelves for books and decorative items (these saved valuable floor space in my small office)
- Filing cabinets (opt for ones that can double as side tables)
- Decorative baskets for corralling smaller items
- Drawer organizers to maintain order in desk drawers
I implemented a “touch it once” rule—when papers come into my office, I immediately file them instead of creating piles to deal with “later” (which, let’s be honest, often means never).
Step 5: Set the Mood with Lighting
Poor lighting can cause eye strain, and headaches, and make your beautiful new office feel dreary. This is something I didn’t consider carefully enough at first and had to correct later.

Aim for layers of light:
- Natural light is ideal—position your desk to take advantage of windows without creating glare on your screen
- Task lighting for focused work (an adjustable desk lamp is essential)
- Ambient lighting to create a pleasant atmosphere
In my north-facing office, I installed a daylight-spectrum floor lamp in the corner furthest from the window to balance the room’s light. The difference was dramatic—the space instantly felt larger and more inviting.
Consider light temperature too—cooler, bluer lights can improve focus during work hours, while warmer lights create a cozier atmosphere for evening work.
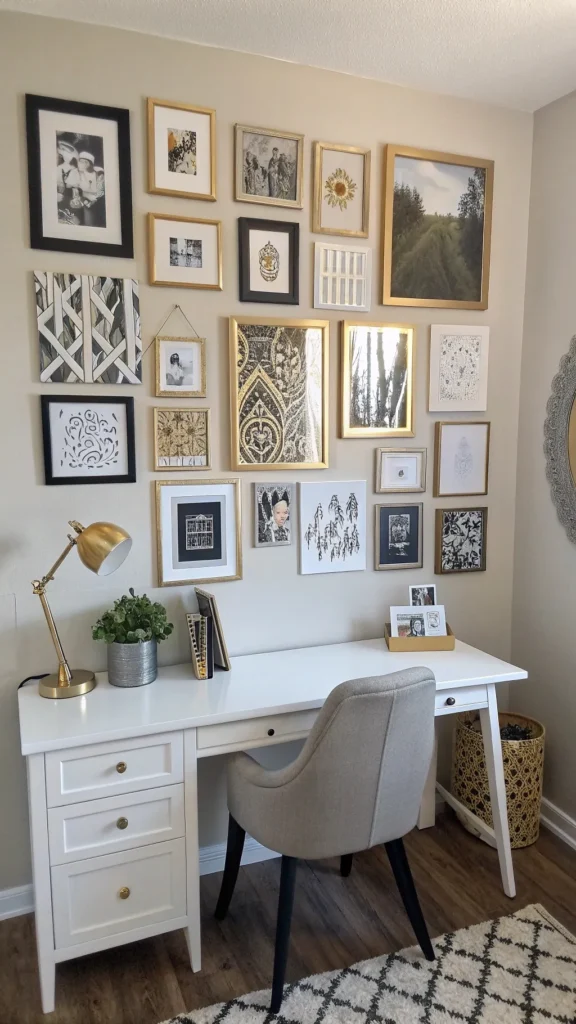
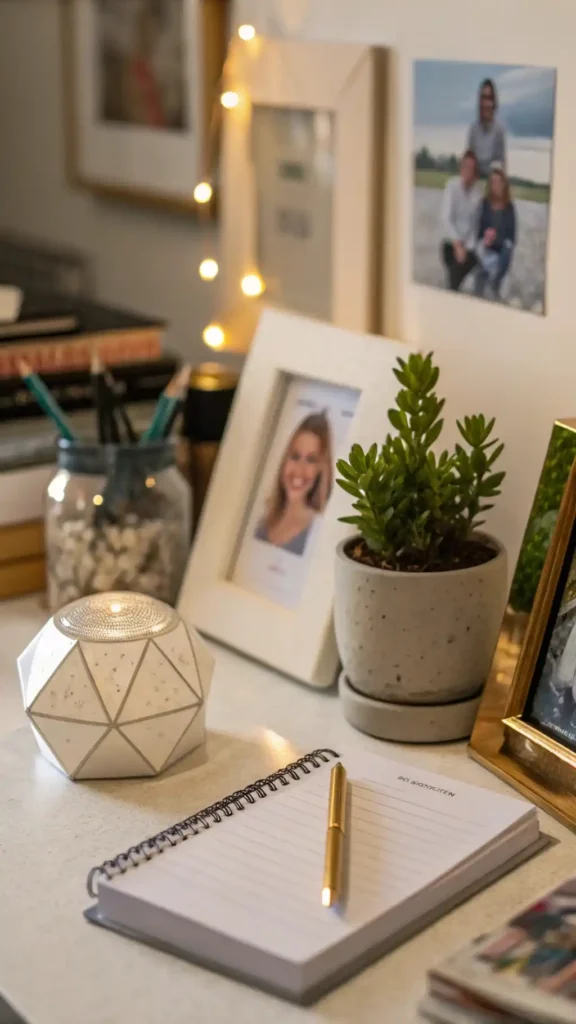
Step 6: Add Personal Touches and Decor
This is where your office transforms from functional to inspirational. When I added meaningful decor to my space, my creativity noticeably improved.
Consider incorporating:
- Plants to improve air quality and bring life to the space (my snake plant thrives even with my inconsistent care)
- Artwork that inspires you—I hung a gallery wall of travel photos that remind me of favorite experiences
- A vision board or framed quotes that motivate you
- Meaningful objects that spark joy or creativity
Remember to strike a balance—too many decorative items can become visual clutter. I follow the “rule of three” for my desktop: no more than three decorative items to maintain a clean look.
Step 7: Incorporate Technology and Cable Management
In our digital world, technology integration and cable management are crucial for a functional and visually appealing workspace.

Start with a realistic assessment of what devices you use daily and plan accordingly:
- Position your computer monitor at eye level (I use a simple stand)
- Create a charging station for devices
- Ensure you have enough outlets (consider a surge protector with USB ports)
Cable management made an astonishing difference in how polished my office looks. Simple solutions include:
- Cable clips that adhere to your desk
- Cable sleeves to bundle cords together
- Under-desk trays to hide power strips and excess cord length
I spent just $25 on cable management tools, and it was transformative—no more tangled cord nests or accidentally unplugging my computer with my foot!
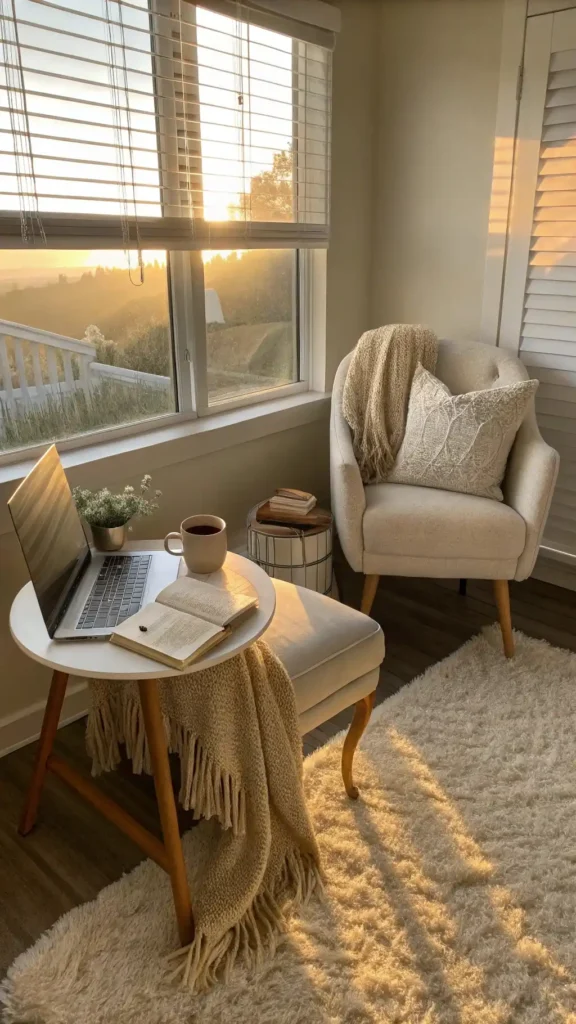
Step 8: Create a Comfortable and Inviting Atmosphere
Your office should be a place you want to spend time in. After focusing on function, I added elements that make the space feel welcoming and comfortable.
Consider these additions:
- A small area rug to define the space and add warmth (especially on hard flooring)
- A comfortable secondary seating option for reading or phone calls—I tucked a small armchair into the corner
- Adjustable window treatments that control light and provide privacy when needed
- A small diffuser with energizing scents like citrus or peppermint
Temperature comfort matters too—I added a small fan for summer months and keep a light throw blanket handy for chillier days.
Step 9: Test and Adjust Your Setup
The perfect home office evolves with use. Plan to spend at least a week working in your new space before declaring the project complete.
Pay attention to:
- Any discomfort in your body after working (adjust your ergonomics)
- Workflow inefficiencies (rearrange items you use frequently)
- Lighting issues at different times of day
- Temperature and air circulation
I discovered I needed to move my printer from my desk to a side table to have enough workspace, and I adjusted my monitor height after noticing I was tilting my neck downward.
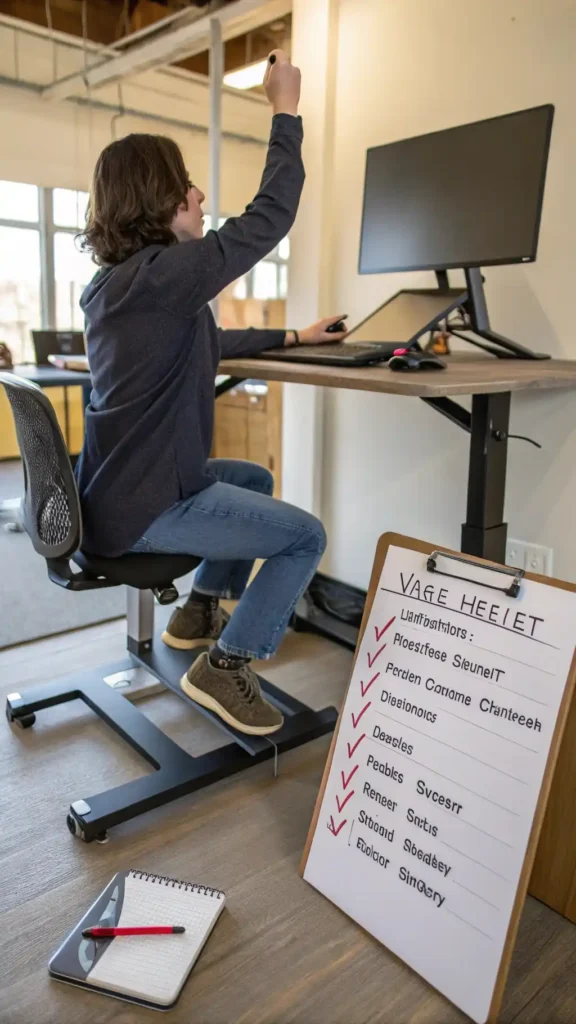
Keep a small notepad handy during this testing phase to jot down adjustments you want to make—these observations are invaluable for fine-tuning your space.
Your Dream Office Awaits
Transforming your spare room into a dream home office doesn’t have to be overwhelming. By following these steps—decluttering, planning the layout, choosing furniture, maximizing storage, setting the lighting, adding decor, organizing tech, creating comfort, and testing the setup—you can create a workspace that’s not only functional but also a joy to spend time in.
Remember that your home office is a reflection of you and your work style. Mine contains elements that might not work for everyone (like my collection of vintage typewriters), but they inspire me every day.
So, roll up your sleeves, embrace the process, and start designing your dream home office today! Your future productive, comfortable self will thank you.